Installing ADSS cable (All-Dielectric Self-Supporting fiber optic cable) is a critical task in modern telecommunications networks, especially for aerial deployment along power lines and utility corridors. Because ADSS cable is widely used in high-voltage environments, correct installation is essential for safety, signal stability, and long-term performance.
This guide provides a comprehensive, professional, explanation of how to install ADSS cable, including tools, planning, step-by-step procedures, tension control, safety requirements, and troubleshooting insights. It is designed for engineers, contractors, telecom planners, and infrastructure decision-makers.
1. What is ADSS Cable?
ADSS cable, or All-Dielectric Self-Supporting cable, is a type of fiber optic cable designed for aerial installation without the need for metallic support wires.
ADSS Cable is made entirely from non-metallic materials, which means it is immune to electromagnetic interference (EMI) and can be safely installed near high-voltage power lines.
Key Characteristics:
- Fully dielectric (no metal components)
- Self-supporting for aerial spans
- Resistant to electrical interference
- Lightweight and durable
- Designed for medium to long-span installations
Common Applications:
- Power utility communication networks
- Railway communication systems
- Rural broadband deployment
- Smart grid infrastructure
- Long-distance fiber backbones

2. Why Proper Installation of ADSS Cable Matters
Improper installation can lead to:
- Fiber attenuation increase
- Cable sag or mechanical failure
- Wind-induced vibration damage
- Electrical tracking (corona damage)
- Reduced lifespan of the network
Because ADSS cables are installed near energized conductors, installation precision directly impacts safety and reliability.
3. Pre-Installation Planning for ADSS Cable
Before any physical installation begins, a detailed engineering survey is mandatory.
3.1 Route Survey
A route survey identifies:
- Pole locations
- Span distances
- Clearance from power lines
- Obstructions (trees, buildings, terrain)
- Environmental risks (wind zones, ice loading)
3.2 Mechanical Design Calculation
Engineers must calculate:
- Maximum allowable tension
- Sag-tension curves
- Wind load impact
- Ice load conditions
- Span length limits
This ensures the cable performs safely under real-world conditions.
3.3 Cable Selection
Selecting the correct ADSS cable depends on:
- Span length (short, medium, long span)
- Voltage level of nearby power lines
- Environmental conditions
- Required fiber count
3.4 Permits and Safety Clearance
Before installation:
- Obtain utility permissions
- Confirm electrical safety clearance
- Follow national electrical codes (NEC or IEC standards)
4. Tools and Equipment Required for ADSS Cable Installation
Proper tools ensure safe and efficient installation.
4.1 Essential Installation Tools
- Cable reel stand
- Tension machine (come-along or winch)
- Pulley blocks (sheaves)
- Grip clamps
- Fiber optic cleaver and splicing tools
- Dynamometer (tension measurement device)
- Messenger wire grips (if required)
4.2 Safety Equipment
- Insulated gloves
- Helmet and safety harness
- Arc flash protective clothing
- Insulated ladders or aerial lifts
- High-voltage detection equipment
4.3 Optional Advanced Tools
- OTDR (Optical Time-Domain Reflectometer)
- Cable sag measurement system
- Drone inspection tools
5. Installation Methods for ADSS Cable
There are two main installation methods:
5.1 Tension Stringing Method (Most Common)
Used for medium and long spans, especially in power line corridors.
5.2 Slack Installation Method
Used for short distances or urban environments with low mechanical stress.
6. Step-by-Step Installation Process of ADSS Cable
Below is a professional-grade installation procedure used in telecom and utility projects.
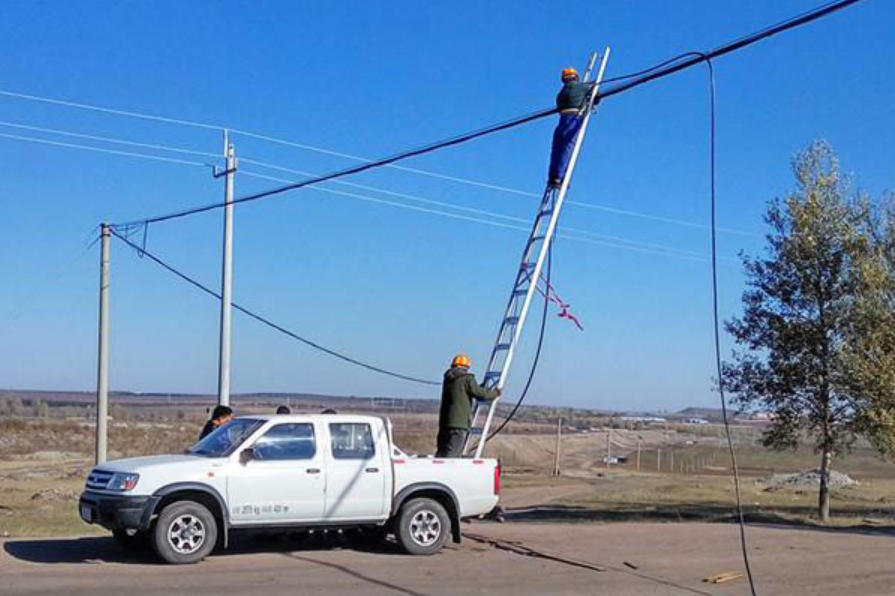
Step 1: Site Preparation
Before installation begins:
- Inspect all poles or towers
- Confirm structural strength of supports
- Install crossarms and brackets
- Verify grounding conditions of surrounding infrastructure (even though ADSS is non-metallic, surrounding structures matter)
Clear vegetation and obstacles along the cable route.
Step 2: Setting Up Cable Drum
- Position cable reel at the starting pole
- Ensure smooth rotation without jerking
- Align cable direction with route path
- Use brake system to control payout speed
Incorrect drum setup can cause:
- Cable twisting
- Sheath damage
- Fiber microbends
Step 3: Installing Pulley System
Install pulley blocks at each pole:
- Ensure pulleys match cable diameter
- Maintain proper groove alignment
- Avoid sharp bending angles
The bending radius must always meet manufacturer specifications to prevent internal fiber damage.
Step 4: Pilot Rope Installation
A lightweight pilot rope is first pulled across all spans:
- Use manual or drone-assisted deployment
- Connect rope through pulleys
- Ensure no entanglement with power conductors
This rope is later used to pull the ADSS cable.
Step 5: Pulling the ADSS Cable
This is the most critical stage.
- Attach pulling grip to cable end
- Connect to winch system
- Start pulling at controlled tension
- Monitor tension continuously using a dynamometer
Important Rules:
- Never exceed maximum tension rating
- Maintain steady pulling speed
- Avoid sudden stops or jerks
- Keep communication between ground and tower teams
Step 6: Sag Adjustment
After cable is pulled:
- Adjust sag according to design charts
- Consider temperature conditions
- Account for wind and ice loading
Proper sag ensures:
- Mechanical stability
- Long-term durability
- Reduced stress on poles
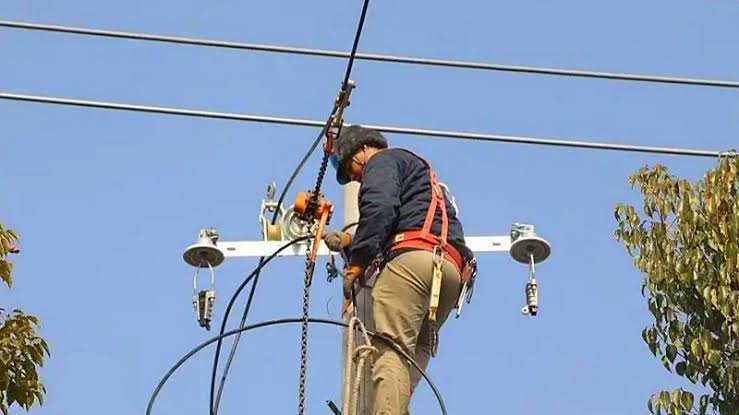
Step 7: Dead-End and Suspension Clamping
Once sag is set:
- Install dead-end clamps at terminal poles
- Secure suspension clamps at intermediate poles
- Ensure correct clamp pressure (not too tight, not too loose)
Clamps must:
- Prevent slippage
- Avoid crushing cable sheath
- Maintain stable geometry
Step 8: Fiber Splicing
After mechanical installation:
- Open fiber access points
- Perform fusion splicing
- Organize fiber trays inside closure boxes
- Seal splice enclosures properly
Use OTDR testing after each splice to ensure signal quality.
Step 9: Grounding and Safety Verification
Although ADSS cable is dielectric:
- Ensure nearby structures are properly grounded
- Check for induction risks
- Confirm clearance distances from power lines
Step 10: Final Inspection and Testing
Final checks include:
- Visual inspection of cable alignment
- Sag verification
- Tension measurement validation
- OTDR testing results
- Mechanical stability check
7. Safety Guidelines for ADSS Cable Installation
Safety is the most important aspect of ADSS installation due to proximity to high-voltage lines.
7.1 Electrical Safety Rules
- Maintain minimum clearance distance from energized lines
- Never install during storms or high winds
- Use insulated tools only
7.2 Mechanical Safety
- Avoid over-tensioning
- Prevent sharp bending
- Use certified clamps and hardware
7.3 Worker Safety
- Mandatory PPE usage
- Fall protection systems required
- No unauthorized climbing
8. Common Installation Mistakes (and How to Avoid Them)
Mistake 1: Incorrect Tension
Problem: Cable sag or excessive stress
Solution: Use calibrated tension meters
Mistake 2: Improper Pulley Alignment
Problem: Sheath damage or microbending
Solution: Align pulleys precisely with cable path
Mistake 3: Ignoring Temperature Effects
Problem: Sag variation after installation
Solution: Adjust sag according to temperature charts
Mistake 4: Poor Clamp Installation
Problem: Cable slippage or crushing
Solution: Use manufacturer-approved clamps
9. Environmental Considerations
ADSS cables are widely used in harsh environments.
Key Environmental Factors:
- Wind load
- Ice accumulation
- UV radiation
- Temperature extremes
- Lightning proximity
Proper engineering design ensures resilience in all conditions.
10. ADSS Cable Design Optimization Tips
For long-term reliability:
- Use correct fiber count (do not overspec unnecessarily)
- Select appropriate sheath material (anti-tracking for high voltage zones)
- Design for future expansion
- Use vibration dampers in windy regions
11. Maintenance After Installation
Even though ADSS cables are low maintenance, periodic checks are important:
- Annual visual inspection
- OTDR testing every 1–2 years
- Clamp and hardware inspection
- Vegetation control near spans
12. Advantages of ADSS Cable Installation
- No need for metallic messenger wire
- Fast deployment
- Lower installation cost compared to OPGW
- Safe near high-voltage lines
- High resistance to environmental stress
13. ADSS Cable vs Other Aerial Fiber Systems
| Feature | ADSS Cable | OPGW | Figure-8 Cable |
|---|---|---|---|
| Metallic Components | No | Yes | Yes |
| Installation Cost | Medium | High | Low |
| Electrical Safety | Excellent | Moderate | Moderate |
| Best Use Case | Power line corridors | Transmission lines | Short spans |
14. Troubleshooting After Installation
Issue: High Signal Loss
- Check splices
- Inspect for microbends
Issue: Excessive Sag
- Recalculate tension
- Inspect clamp slippage
Issue: Cable Vibration
- Install dampers
- Adjust tension balance
15. Future Trends in ADSS Cable Installation
The industry is evolving rapidly:
- Drone-assisted cable installation
- AI-based sag monitoring systems
- Smart fiber monitoring (real-time OTDR)
- Ultra-lightweight composite cables
- Automated tension control systems
These innovations will reduce labor cost and improve installation precision.
Conclusion
Installing ADSS cable is a highly technical process that requires careful planning, precise mechanical execution, and strict safety compliance. From route surveying and tension control to sag adjustment and fiber splicing, every step directly impacts the performance and lifespan of the network.
When properly installed, ADSS Cable provides a durable, interference-free, and cost-effective solution for modern aerial fiber optic communication systems.
Whether deployed in urban grids or remote utility corridors, mastering ADSS cable installation ensures long-term network stability and scalable broadband infrastructure.
FAQ:
What hardware is used with ADSS cable?
Common hardware includes:
- Suspension clamps
- Dead-end clamps
- Tangent assemblies
- Vibration dampers
- Pole brackets
- Tower fittings
- Joint boxes and splice closures
All hardware should be compatible with the cable diameter and span design.
How do you prevent ADSS cable vibration?
Wind-induced vibration can be minimized by:
- Installing vibration dampers
- Maintaining correct cable tension
- Following recommended span lengths
- Using proper suspension hardware
- Conducting regular inspections
This is particularly important in regions with high winds.
Does ADSS cable require grounding?
No.
Because ADSS cable contains no metallic components, it generally does not require grounding.
However, associated equipment such as:
- Cabinets
- Communication shelters
- Splice enclosures mounted on metallic structures
may require grounding according to local regulations.
How long does ADSS cable last?
A high-quality ADSS cable can typically provide:
20–30 years or more of service life under normal operating conditions.
Factors affecting lifespan include:
- UV exposure
- Temperature fluctuations
- Wind and ice loading
- Installation quality
- Hardware condition
Proper installation significantly extends cable life.
What causes ADSS cable failure?
Common causes include:
- Excessive installation tension
- Improper sag settings
- Electrical tracking damage
- Mechanical abrasion
- Rodent attacks
- Poor-quality hardware
- Severe weather conditions
Routine inspections help identify potential issues before failure occurs.
How is ADSS cable tested after installation?
Post-installation testing usually includes:
OTDR Testing
Measures:
- Fiber attenuation
- Splice loss
- Connector loss
- Fault locations
Optical Power Testing
Verifies:
- Signal strength
- End-to-end performance
Visual Inspection
Checks:
- Cable sag
- Hardware integrity
- Pole attachment security
What is the difference between ADSS cable and OPGW?
| Feature | ADSS Cable | OPGW |
|---|---|---|
| Metal Components | No | Yes |
| Self-Supporting | Yes | No |
| EMI Resistance | Excellent | Moderate |
| Installation Location | Alongside power lines | Replaces ground wire |
| Installation Cost | Lower | Higher |
| Maintenance Complexity | Lower | Higher |
ADSS is typically preferred for distribution networks, while OPGW is commonly used on transmission lines.
Is ADSS cable suitable for harsh environments?
Yes.
Modern ADSS cables are designed to withstand:
- High humidity
- UV exposure
- Salt fog environments
- Strong winds
- Ice loading
- Extreme temperatures
Special jacket materials are available for coastal, desert, and high-voltage applications.
How often should ADSS cable be inspected?
Recommended inspection schedule:
- Visual inspection: Every 6–12 months
- Hardware inspection: Annually
- OTDR testing: Every 1–2 years
- After major storms or natural disasters
Regular maintenance helps maximize network reliability.
Can ADSS cable be used for FTTH networks?
Yes.
ADSS cable is often deployed as a backbone or feeder cable in Fiber-to-the-Home (FTTH) projects, especially in rural and suburban areas where aerial installation is more cost-effective than underground deployment.
What are the biggest installation mistakes to avoid?
The most common ADSS installation errors include:
- Exceeding maximum pulling tension
- Ignoring minimum bending radius requirements
- Incorrect sag adjustment
- Using incompatible hardware
- Installing without route engineering analysis
- Failing to monitor cable tension during stringing
- Neglecting post-installation OTDR testing
Avoiding these mistakes can significantly improve network performance and service life.